Using Eclipse
GWT provides a set of tools that can simply be used with a text editor, the command line, and a browser. However, you may also use GWT with your favorite IDE. Google provides a plugin for Eclipse that makes development with GWT even easier.
- Download Eclipse
- Install the Plugin
- Create a Web Application
- Run locally in Development Mode
- Compile and run in Production Mode
- Deploy to App Engine
Download Eclipse
If you do not already have Eclipse, you may download it from the Eclipse Website.
Install the Plugin

Install the Google Plugin for Eclipse following these instructions
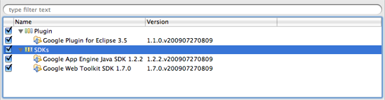
In the Install dialog, you will see an option to install the Plugin as well as the GWT and App Engine SDKs. Choosing the SDK options will install a GWT and/or App Engine SDK within your Eclipse plugin directory as a convenience.
GWT release candidates are not bundled with The Google Plugin For Eclipse. If you’re interested in using a GWT RC SDK, download and add it to your workspace as described here.
Create a Web Application
To create a Web Application, select File > New > Web Application Project from the Eclipse menu.
In the New Web Application Project wizard, enter a name for your project and a java package name, e.g., com.mycompany.mywebapp If you installed the Google App Engine SDK, the wizard gives you the option to use App Engine as well. For now, uncheck this option and click Finish.

Congratulations, you now have a GWT enabled web application. The plugin has created a boilerplate project in your workspace.
Run locally in Development Mode
Right-click on your web application project and select Debug As > Web Application from the popup menu.
This creates a Web Application launch configuration for you and launches it. The web application launch configuration will start a local web server and GWT development mode server.
You will find a Web Application view next to the console window. Inside you will find the URL for the development mode server. Paste this URL into Firefox, Internet Explorer, Chrome, or Safari. If this is your first time using that browser with the development mode server, it will prompt you to install the GWT Developer Plugin. Follow the instructions in the browser to install.
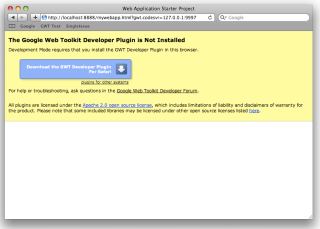
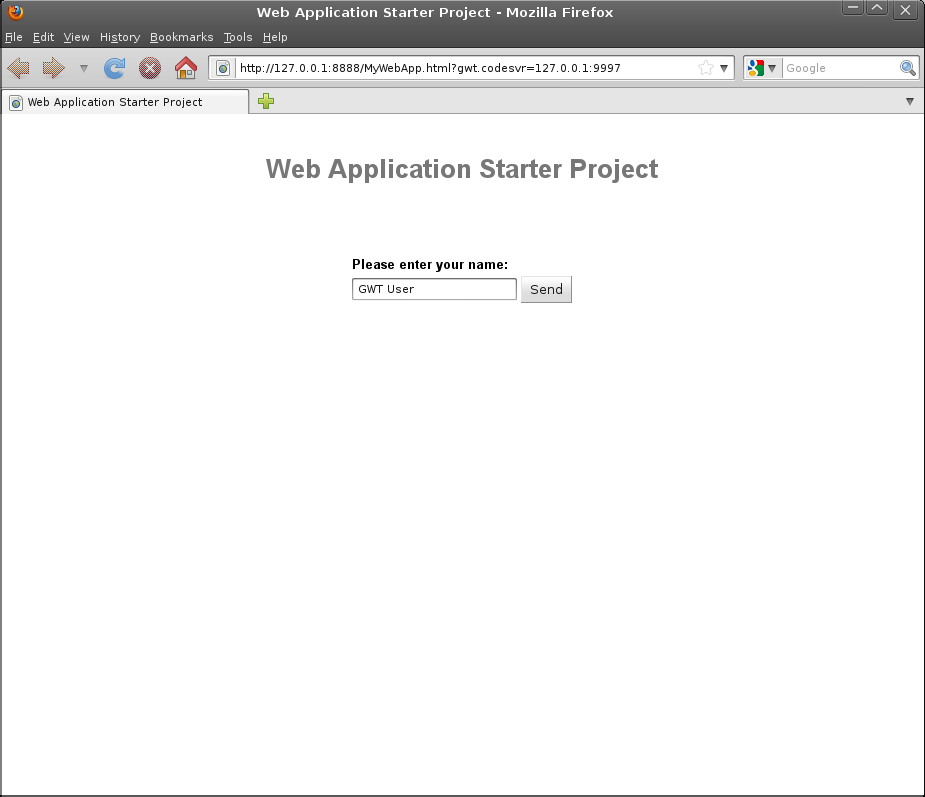
Once the browser plugin is installed, navigate to the URL again and the starter application will load in development mode.
Make a Few Changes
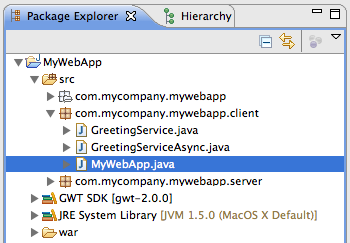
The source code for the starter application is in the
MyWebApp/src/
subdirectory, where MyWebApp is the name you gave to the project. You’ll see two packages,
com.mycompany.mywebapp.client
and
com.mycompany.mywebapp.server
Inside the client package is code that will eventually be compiled to JavaScript and run as client code in the browser. The java files in the server package will be run as Java bytecode on a server.
Look inside the
MyWebApp.java
file in the client package. Line 40 constructs the send button.
final Button sendButton = new Button("Send");
Change the text from “Send” to “Send to Server”.
final Button sendButton = new Button("Send to Server");
Now, save the file and simply click “Refresh” back in your browser to see your change. The button should now say “Send to Server” instead of “Send”.
At this point, you can also set breakpoints, inspect variables and modify code as you would normally expect from a Java Eclipse debugging session.
Compile and run in Production Mode
To run the application as JavaScript in what GWT calls “production mode”, compile the application by right-clicking the project and choosing Google > GWT Compile.
This command invokes the GWT compiler which generates a number of JavaScript and HTML files from the MyWebApp Java source code in the
MyWebApp/war/
subdirectory. To see the final application, open the file
MyWebApp/war/MyWebApp.html
in your web browser.
Congratulations! You’ve created your first web application using GWT. Since you’ve compiled the project, you’re now running pure JavaScript and HTML that works in IE, Chrome, Firefox, Safari, and Opera. You could now deploy your application to production by serving the HTML and JavaScript files in your
MyWebApp/war/
directory from your web servers.
Deploy to App Engine
Using the plugin, you can also easily deploy GWT projects to Google App Engine. If you installed the App Engine for Java SDK when you installed the plugin, you can now right-click on the project and App Engine “enable” it by choosing Google > App Engine Settings. Check the box marked Use Google App Engine. This will add the necessary configuration files to your project.
To deploy your project to App Engine, you first need to create an application ID from the App Engine Administration Console.
Once you have an application ID, right-click on your project, and select Google > App Engine Settings… from the context menu. Enter your application ID into the Application ID text box. Click OK.
Right-click on your project and select Google > Deploy to App Engine. In the resulting Deploy Project to Google App Engine dialog, enter your Google Account email and password.
Click Deploy.
Congratulations! You now have a new web application built with GWT live on the web at
http://_application-id_.appspot.com/.